This last weekeend I decided that I wanted to properly start my scraper-checker-downloader project that I’ve been doing in different repositories.
After starting yet another project, this had to be cool, like real cool, using CI/CD, pull request, documentation, badges in readme, everything that I’ve seen that it’s cool and indeed are the best practices.
And after a good weekend I ended up creating Dramarr, a set of tools that scrap and download shows from different sources.
It has different repositories in the organization and most of them are libraries that are being compiled, tested and deployed themselves in the pull request and when they’re merged in the master branch.
That is what it’s called CI/CD or continuous intregration/continuous delivery.
But for this tutorial we are just going to talk about CI.
Continuous integration
What is it?
Taken from Martin Fowler’s blog, which is the best explanation that I’ve read:
Continuous Integration is a software development practice where members of a team integrate their work frequently, usually each person integrates at least daily - leading to multiple integrations per day. Each integration is verified by an automated build (including test) to detect integration errors as quickly as possible.
Tools
There are many tools to integrate your workflow with CI/CD, but for this tutorial we’ll be using Github to store our code and the TravisCI tools to setup the CI. Regarding the language and frameworks, we will use C# and the new.NET Core 3.0.
Requirements
In order to make this work you need three simple things:
- Latest version of Visual Studio 2019
- Github account
- Travis-CI account linked to your Github account
Project
For the sake of this tutorial, we will be doing a simple Calculator. We will be creating a library, a command line tool and a testing project to test everything.
This testing project will also be running when we set up the CI, meaning that if in the future we make a change to the code and the tests that we initially created are not passing, we will be getting a notification or we could simply reject the pull request.
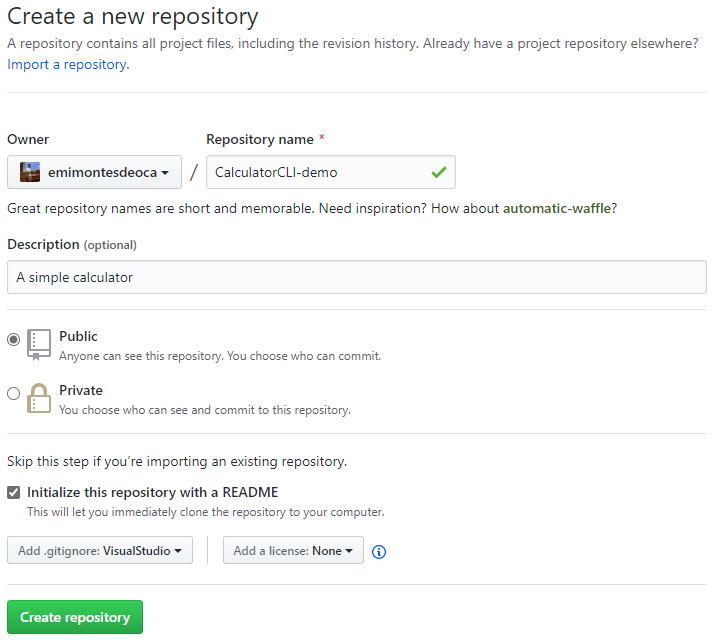
Creating the Github repository
First, we will be creating a Github repository, so reach over to Github and create the repository and the clone it to your local environment. I decided to call this new repository CalculatorCLI-demo.
Creating the solution
Now let’s create an empty solution called CalculatorCLI, in the root folder of the cloned repository
Core library
As it would be in a real world project, we will be storing our logic in a separate project that generates a library, so let’s create it.
Go and create a Class Library (.NET Standard) and name it CalculatorCLI.Core
NET Core version
As soon as you create the project, go to the project properties and change the Target framework to .NET Standard 2.1, in order to make it compatible with projects built in .NET Core 3.0.
Code
For the sake of the tutorial, let’s make a simple class that handles operations.
using System;
namespace ConsoleCalculator.Core
{
   public enum OperatorsEnum
   {
       ADD,
       SUBSTRACT,
       MULTIPLY,
       DIVIDE
    }

    public class Operation
    {
        public OperatorsEnum OperatorEnum { get; set; }
        public int LeftValue { get; set; }
        public int RightValue { get; set; }

        public Operation(string operatorString, int leftValue, int rightValue)
        {
          switch (operatorString)
          {
               case "+":
                    OperatorEnum = OperatorsEnum.ADD;
                    break;
               case "-": OperatorEnum = OperatorsEnum.SUBSTRACT;
               break;
               case "*":
                   OperatorEnum = OperatorsEnum.MULTIPLY;
                   break;
               case "/":
                   OperatorEnum = OperatorsEnum.DIVIDE;
                   break;
               default:
                   throw new Exception("Operator invalid");
          }

          LeftValue = leftValue;
          RightValue = rightValue;
    }

    public int DoOperation()
    {

        switch (OperatorEnum)
         {
            case OperatorsEnum.ADD:
                return LeftValue + RightValue;
            case OperatorsEnum.SUBSTRACT:
                return LeftValue - RightValue;
            case OperatorsEnum.MULTIPLY:
                return LeftValue * RightValue;
            case OperatorsEnum.DIVIDE:
                return LeftValue / RightValue;
            default: throw new Exception("Operator is not valid");
          }
      }
   }
}
CLI
Now that we have the core project, let’s create the application. In this case it will be a simple console application that accepts arguments and it shows a ouputs a result.
So let’s go ahead and create a new Console App (.NET Core), I named it CalculatorCLI.CLI.
NET Core version
As we did before, as soon as you create the project, go to the project properties and change the Target framework to .NET Core 3.0, if it’s not like that already.
Then add the reference to the ConsoleCLI.Core to our newly created project.
Code
Now for the code, this is simpler than before.
using ConsoleCalculator.Core;
using System;
using System.Text.RegularExpressions;

namespace ConsoleCalculator.CLI
{
    public class Program
    {
       public static void Main(string[] args)
       {
           if (args.Length == 0)
           {
               PrintUsage();
           }
           else
           {
               var joinedArgs = string.Join(" ", args);
               var regex = @"-op [\+\-\*\/] -l [-0-9]+ -r [-0-9]+";

               if (Regex.IsMatch(joinedArgs, regex))
               {
                   int _left = Int32.Parse(args);
                   int _right = Int32.Parse(args);
                   string _operator = args;

                   var _operation = new Operation(_operator, _left, _right);
                   var _result = _operation.DoOperation();

                   Console.WriteLine($"Result is: {_result}");
                }
                else
                {
                    PrintUsage();
                 }
           }
      }

      public static void PrintUsage()
      {
          Console.WriteLine($"Welcome to ConsoleCalculator!");
          Console.WriteLine($"");
          Console.WriteLine($"-op Operator, it must be +,-,*,/");
          Console.WriteLine($"-l Left number");
          Console.WriteLine($"-r Left number");
          Console.WriteLine($"");
          Console.WriteLine($"Example usage: -op + -l 5 -r 6");
      }
   }
}
We will be using this application from command like, so in order to make it work, we have to call it passing some parameters. For example:
ConsoleCalculator.CLI.exe -op + -l 10 -r 20
Which translates to:
ConsoleCalculator.CLI.exe -operator + -leftValue 10 -rightValue 20
The code for that is pretty simple, if it doesn’t match a certain regex pattern, it’s a wrong call and it call the PrintUsage(). This means that if we enter a something different than a number, because it’s set on the regex, it won’t even try to make hte calculation.
That means, if we call it like this:
ConsoleCalculator.CLI.exe -operator + -leftValue asdfg -rightValue ghjk
It won’t ever enter inside the operations logic and we are saving future checks like TryParseing the values.
Test
We have the core library and the command line, but we need now testing, because that’s what we want to do in the CI.
So let’s go ahead and create a new MSTest Test Project (.NET Core) and name it CalculatorCLI.Tests.
NET Core version
As we did before, as soon as you create the project, go to the project properties and change the Target framework to .NET Core 3.0, if it’s not like that already.
Then add the reference to the ConsoleCLI.Core and ConsoleCLI.Core to our newly created test project.
Code
We are going to split the test in two different files: CoreTests.cs and CLITests.cs
using CalculatorCLI.Core;
using Microsoft.VisualStudio.TestTools.UnitTesting;
using System;
using System.Collections.Generic;
using System.Text;

namespace CalculatorCLI.Tests
{
    [TestClass]
    public class CoreTests
    {
        public int _left = 2;
        public int _right = 2;

        [TestMethod]
        public void ShouldAdd()
        {

            var expectedResult = 4;
            var operation = new Operation("+", _left, _right);
            var functionResult = operation.DoOperation();

            Assert.AreEqual(functionResult, expectedResult);
        }

        [TestMethod]
        public void ShouldSubstract()
        {
           var expectedResult = 0;
           var operation = new Operation("-", _left, _right);
           var functionResult = operation.DoOperation();

           Assert.AreEqual(functionResult, expectedResult);
        }

        [TestMethod]
        public void ShouldMultiply()
        {
            var expectedResult = 4;
            var operation = new Operation("*", _left, _right);
            var functionResult = operation.DoOperation();

            Assert.AreEqual(functionResult, expectedResult);
        }

        [TestMethod]
        public void ShouldDivide()
        {
        var expectedResult = 1;
        var operation = new Operation("/", _left, _right);
        var functionResult = operation.DoOperation();

            Assert.AreEqual(functionResult, expectedResult);
         }

         [TestMethod]

         public void ShouldThrowExceptionForDivideByZero()
         {
            var operation = new Operation("/", _left, 0);
            operation.DoOperation();
         }
         [TestMethod]

         public void ShouldThrowExceptionForWrongOperator()
         {
             var operation = new Operation("text", _left, 0);
             operation.DoOperation();
         }
     }
}
using Microsoft.VisualStudio.TestTools.UnitTesting;
using System;
using System.Collections.Generic;
using System.Text;

namespace CalculatorCLI.Tests
{
   [TestClass]
   public class CLITests
   {
       public string _left = "2";
       public string _right = "2";

       [TestMethod]
       public void ShouldAdd()
       {
          var args = new string[] { "-op", "+", "-l", "45", "-r", "96" };
          CalculatorCLI.CLI.Program.Main(args);
       }

       [TestMethod]
       public void ShouldSubstract()
       {
          var args = new string[] { "-op", "-", "-l", "45", "-r", "96" };
          CalculatorCLI.CLI.Program.Main(args);
       }

       [TestMethod]
       public void ShouldMultiply()
       {
           var args = new string[] { "-op", "*", "-l", "45", "-r", "96" };
           CalculatorCLI.CLI.Program.Main(args);
       }

       [TestMethod]
       public void ShouldDivide()
       {
           var args = new string[] { "-op", "/", "-l", "45", "-r", "96" };
           CalculatorCLI.CLI.Program.Main(args);
       }
   }
}
With everything created we will end up with a solution like this:
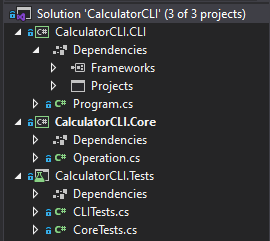
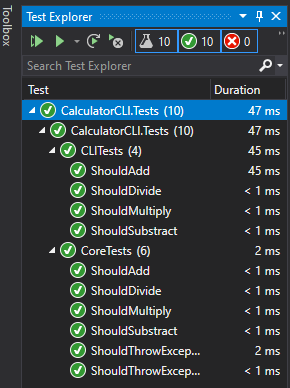
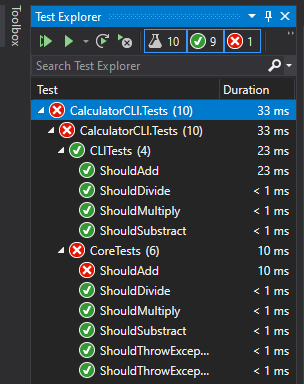
And with this we can now run the Tests, so go to the Test Explorer in the Visual Studio and run them!
Travis CI
If you don’t already now, TravisCI is a hosted continuous integration and deployment system.
There are some steps that we have to here, but first we are going to link our Github repository to be listened by the TravisCI agents in order to build and test our project.
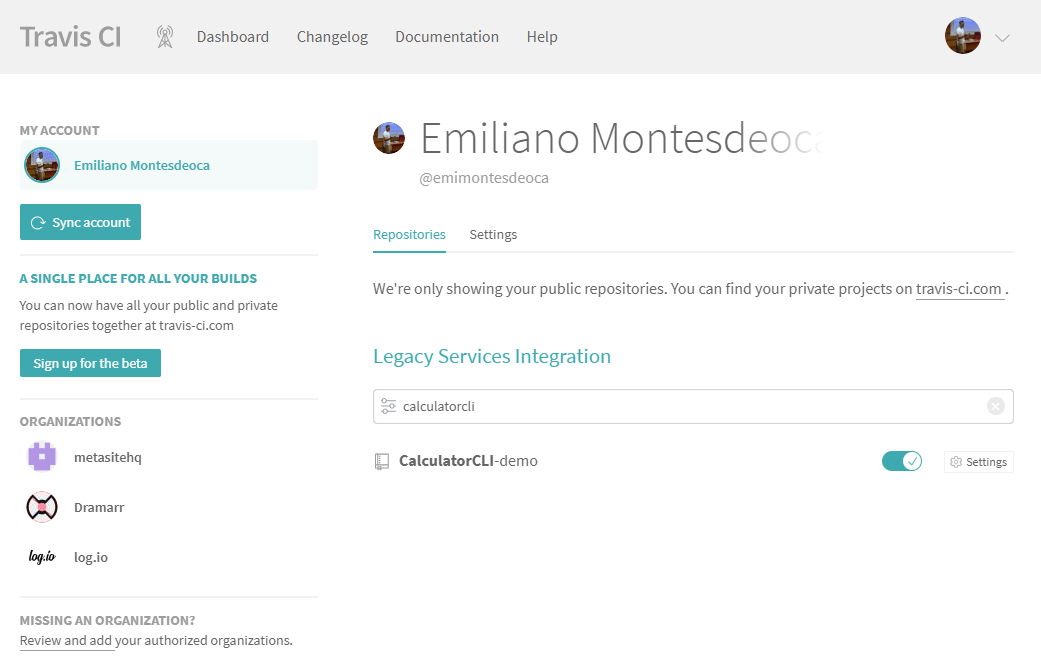
Enable repository
In order to do this, login to the Travis CI page and go to your repositories, then filter for the project that you created and enable it, by clicking on the slider next to the repository name.
Create .travis.yml
We need to create a file called .travis.yml in the root of you project, this is because as stated in the documentation:
Travis only runs builds on the commits you push after you’ve added a .travis.yml file.
So go and create a .travis.yml file in the root of the repository with the following lines:
language:
    csharp
sudo: required
mono: none
dotnet: 3.0

os: - linux

before_script:
- dotnet restore ".\CalculatorCLI\CalculatorCLI.sln"

script:
- dotnet build ".\CalculatorCLI\CalculatorCLI.sln" -c Release
- dotnet test ".\CalculatorCLI\CalculatorCLI.sln" -c Release -v n
I won’t get into the sytax of how the .travis.yml file works, but let’s review what this is doing:
- We set up that the language will be
csharp.
- We won’t be using
mono because .NET Core 3.0 will run native in Linux.
- We set the
dotnet version to 3.0.
- We set the
os, by default it’s linux but I added it anyways.
- Now we have
before_script which will wun before the major logic .here, so what I put was to run dotnet restore to the solution so everything loads perfectly later.
- Now in the
script, we will be doing a dotnet builld and dotnet test to our solution, this will check that it compiles and then run the tests.
Aaand we are done!
Upload to master
Now we just need to push everything to master.
git add --all
git commit -m "Initial files"
git push
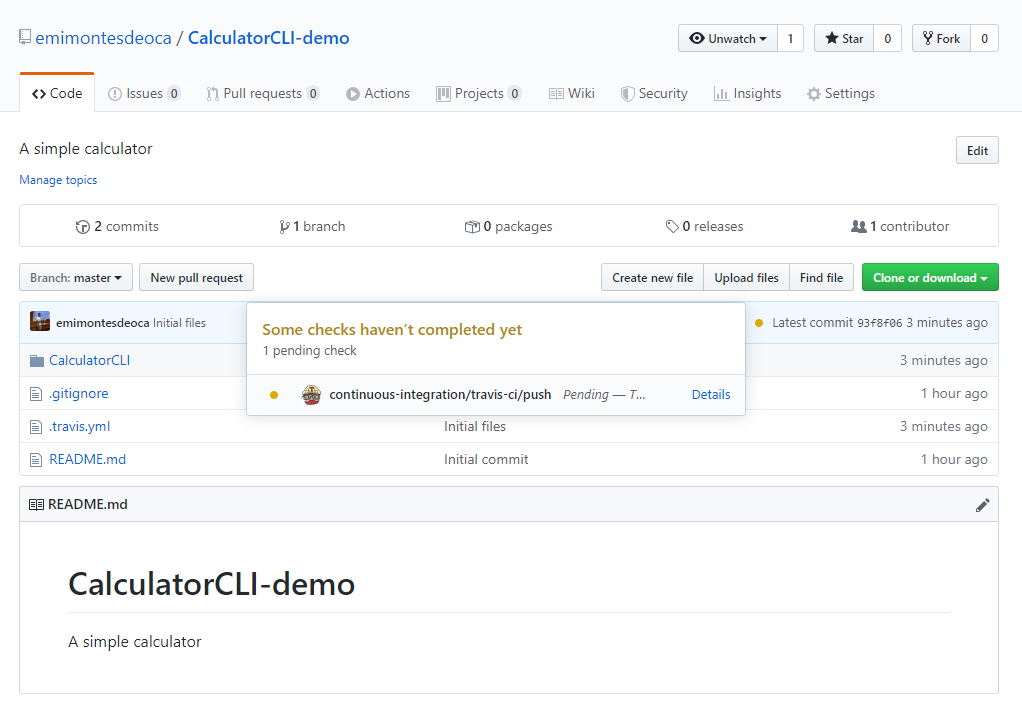
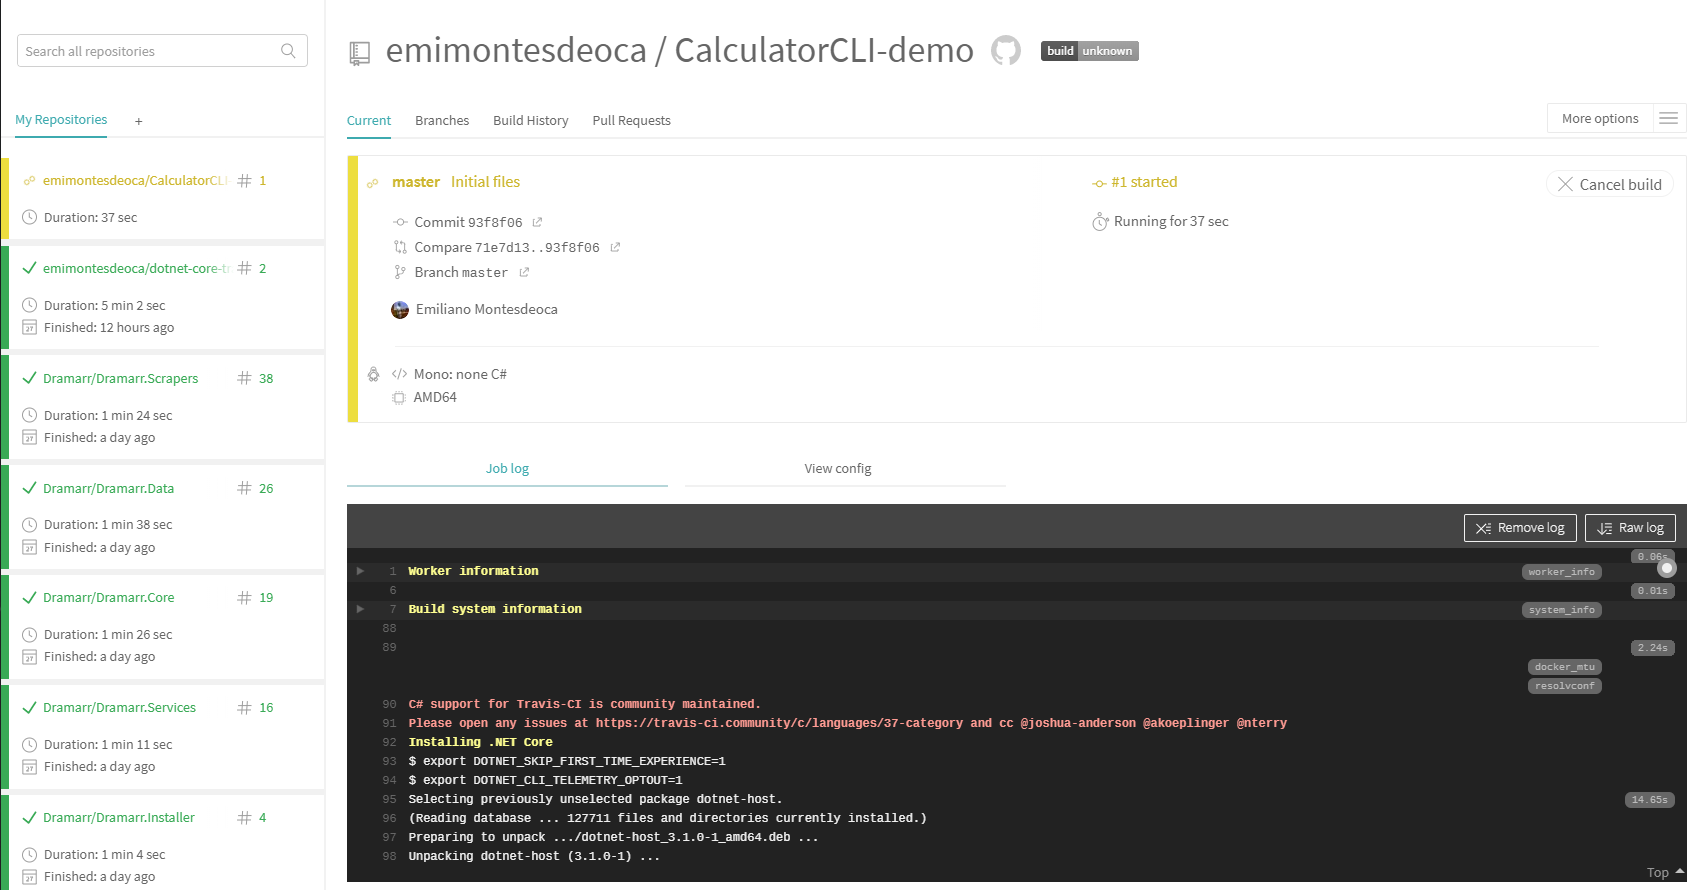
Check continuous integration
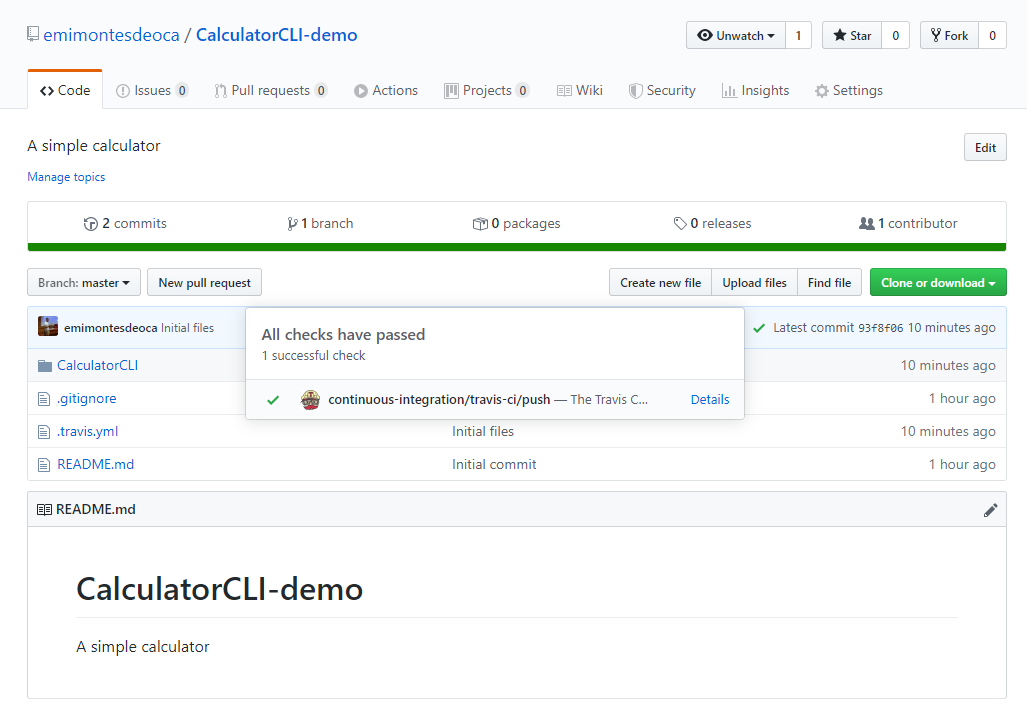
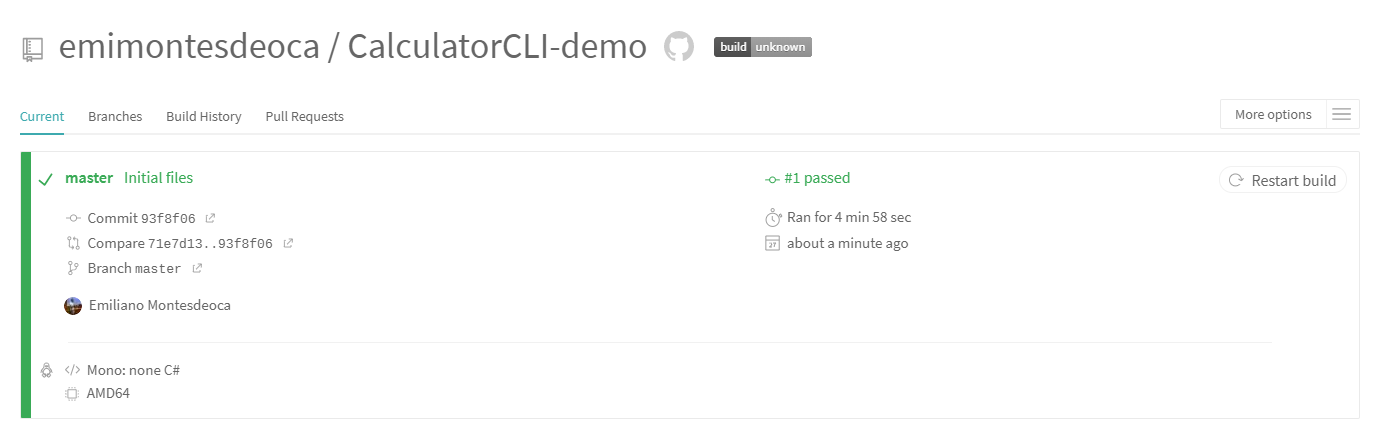
We can check the CI status of the push to master that we did in in both the repository page or the TravisCI dashboard.
On progress
Finished
Let’s break it
Now in order to see how powerful this is, let’s break the code and change the core library in order to make it fail.
Code changes
So go to the Operation.cs and change something that will break some tests.
using System;
namespace CalculatorCLI.Core
{
    public enum OperatorsEnum
    {
      ADD,
      SUBSTRACT,
      MULTIPLY,
      DIVIDE
    }

    public class Operation { public OperatorsEnum OperatorEnum { get; set; }
    public int LeftValue { get; set; }
    public int RightValue { get; set; }

    public Operation(string operatorString, int leftValue, int rightValue)
    {
        switch (operatorString)
        {
           case "+":
               OperatorEnum = OperatorsEnum.SUBSTRACT;
               break;
           case "-":
               OperatorEnum = OperatorsEnum.SUBSTRACT;
               break;
           case "*":
               OperatorEnum = OperatorsEnum.MULTIPLY;
               break;
           case "/":
               OperatorEnum = OperatorsEnum.DIVIDE;
               break;
           default:
               throw new Exception("Operator invalid");
        }

        LeftValue = leftValue;
        RightValue = rightValue;
    }

    public int DoOperation()
    {
        switch (OperatorEnum)
        {
            case OperatorsEnum.ADD:
                return LeftValue + RightValue;
            case OperatorsEnum.SUBSTRACT:
                return LeftValue - RightValue;
            case OperatorsEnum.MULTIPLY:
                return LeftValue * RightValue;
            case OperatorsEnum.DIVIDE:
                return LeftValue / RightValue;
            default:
                throw new Exception("Operator is not valid");
         }
     }
  }
}
And if we run the test again, because we chagned the case to addition, it will fail:
case "+":
    OperatorEnum = OperatorsEnum.SUBSTRACT;
    break;
As expected, it failed for the ShouldAdd case:
Now make a commit of this change and push it to master, and wait for the results from the TravisCI agent.
git add --all git commit -m "Breaking changes" git push
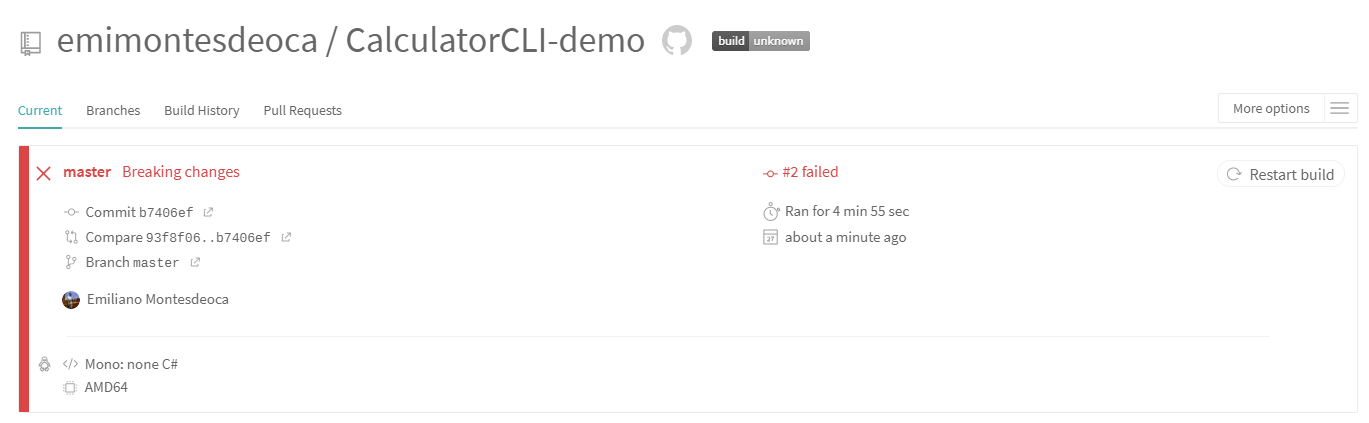
Build
Now let’s go to TravisCI logs and we will see that we successfully broke the project, because the integration test are failing and the build status is error.
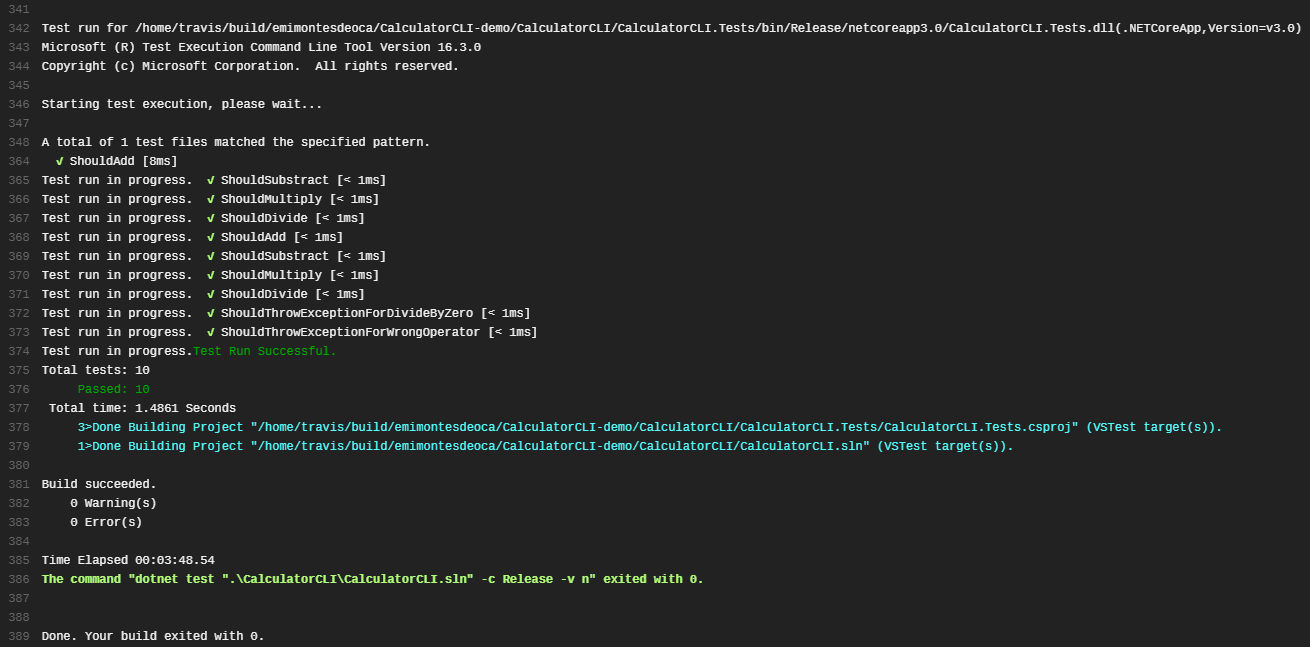
At the very end of the log we can see the error itself:

Let’s fix it again!
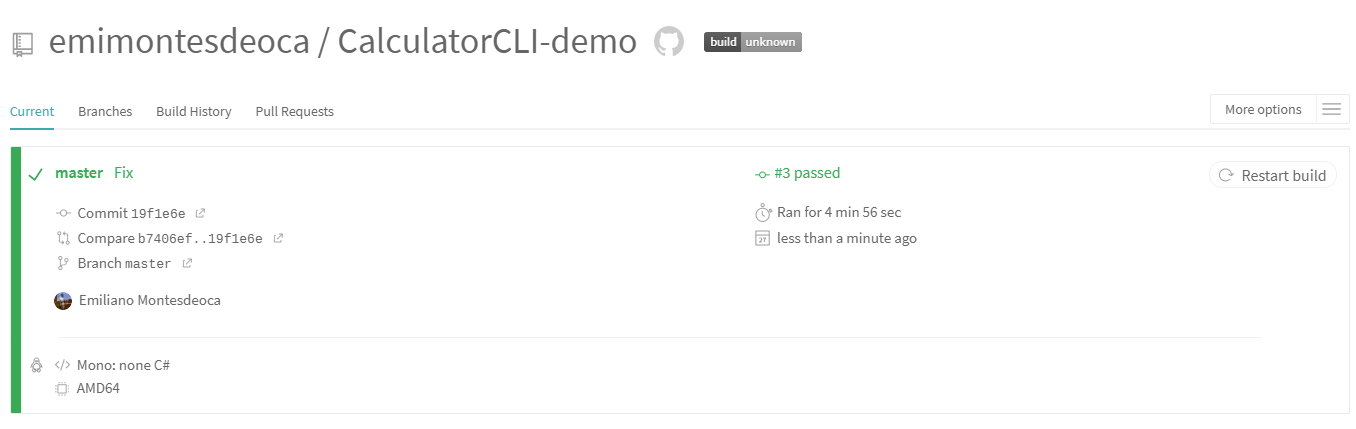
Now revert what we did and push the code to master, and check the status of the new build.
Tests are passing successfully:
And build is also a success:
Conclusion
It’s really quite powerful, CI and CD have existed since long time ago, but now it’s pretty simple to make it run in every single project, it doesn’t matter how small or simple it is.
From my point of view, everyone should at least set up CI for each of their projects, because it’s a good practice and it will eventually save you time debugging and finding error that shouldn’t occurr if you had set proper tests and CI.
That’s it
That’s it about how to create a .NET Core 3.0 solution that has continuous integration on every build using TravisCI and storing the code in Github.
You can find the source code for this project here.