 Let’s Encrypt is a FREE, automated and open Certificate Authority brought to you by the non-profit Internet Security Research Group (ISRG) and supported by big corps such as Google, Facebook, Microsoft, and many others, to have a more secure and privacy-respecting Web.
Many websites and services are already using it worldwide. If you can get SSL certificates issued by a well-known CA for free, there is no excuse to use HTTPS on your website and be secure by default. The process of issuing a Let’s Encrypt certificate can be automated by using a piece of software that uses the ACME protocol, which typically runs on your web host. These certificates normally expire in no longer than 3 months (something that increases the security of the system), so you need to automate the renewals to avoid the manual renewals.
A good example of this implementation is the Azure App Service Let’s Encrypt extension, that automates the renewals by using a webjob. You can read more about it at this Scott Hanselman’s blog post.
When using an Azure Application Gateway, one of the things you need to do is to install the SSL certificate on the gateway. You probably want to implement SSL offloading, so all the resources needed to secure the communication channel is handled by the gateway and not by the servers behind.
On this post I’m going to explain just this scenario, showing how you can automate the Let’s Encrypt SSL renewals on an Azure Application Gateway. Special mention to Ricardo León from Intelequia, who worked on the implementation shown below.
The renewal process explained
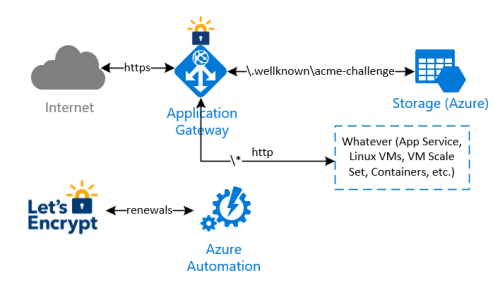
The idea behind this implementation is to avoid any modification on whatever infrastructure is behind the Application Gateway, to complete the renewal checks and validations made by Let’s Encrypt process. In summary:
- an Azure Automation runbook will be executed in a schedule (i.e. once every two weeks) to renew and install the current Let's Encrypt certificate. Let’s Encrypt needs to validate the domain ownership, so it returns a challenge code which is stored by the runbook on a storage account behind the application gateway;
- a special rule on the Application Gateway redirects the validation check coming from Let’s Encrypt to the storage account, so the domain ownership check is successful
- the Azure Automation runbook finally downloads the new certificate and install it on the Application Gateway
Note that with this implementation, there is no need to manipulate any other infrastructure behind the Application Gateway.

Issuing and installing the Let’s Encrypt certificate the first time
I wanted to issue and automate the renewals of Let’s Encrypt certificates for “api.davidjrh.com”. Note that I had already a DNS record of Type A targeting my Application Gateway.
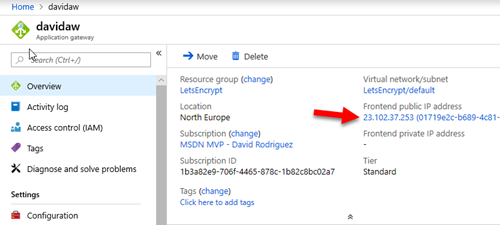
C:\>nslookup api.davidjrh.com
Servidor: google-public-dns-a.google.com
Address: 8.8.8.8
Respuesta no autoritativa:
Nombre: api.davidjrh.com
Address: 23.102.37.253
To implement the Let’s Encrypt renewal process to issue new SSL certificates on the Application Gateway, follow these steps:
Create a Storage Account
1. Create an Azure Storage account that will be used to host the challenge requests for the DNS domain ownership check. Use the cheapest parameters such as “Standard performance” and LRS.
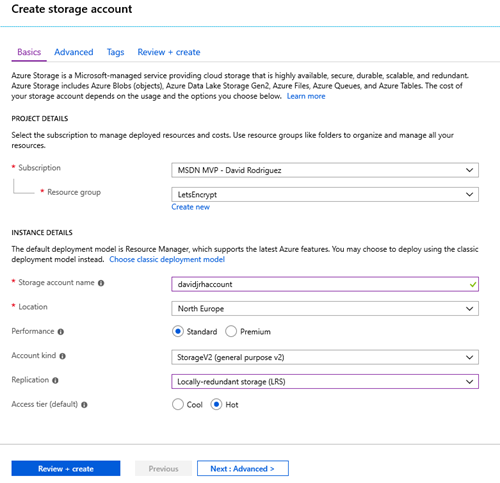
2. Once the storage account is ready, create a “public” container with “public blob” permissions
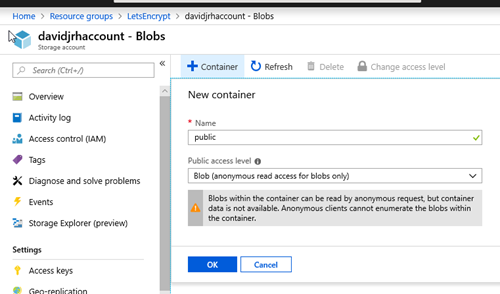
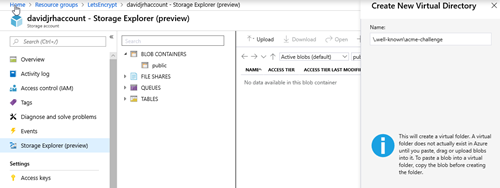
3. Create the virtual directory “\.well-known\acme-challenge” using the Storage Explorer tool.
Modify the Application Gateway to redirect ACME challenge requests to the storage account
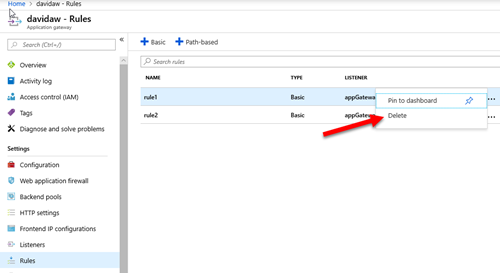
4. When you created the Azure Application Gateway, you probably specified a HTTP rule that was associated to an http listener. In this case, you need to delete that rule that will be replaced by a Path-based rule as shown in the next step
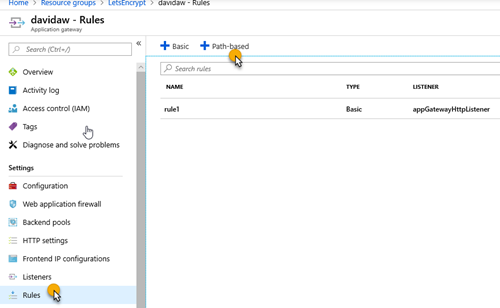
5. Create a new path-based rule that redirects the requests that will be made by Let’s Encrypt on the renewal process with the following configuration:
6. Set the parameters you had on the http rule, and click on “Add Configuration”
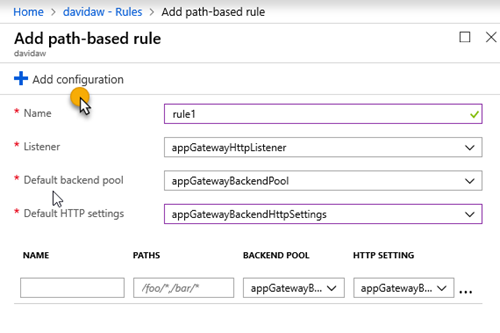
7. Specify the configuration parameters with the path “/.well-known/acme-challenge/*” with a redirection (Permanent), targeting an external site with the storage account container URL you created before:
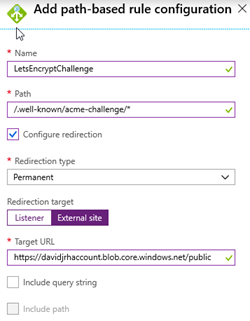
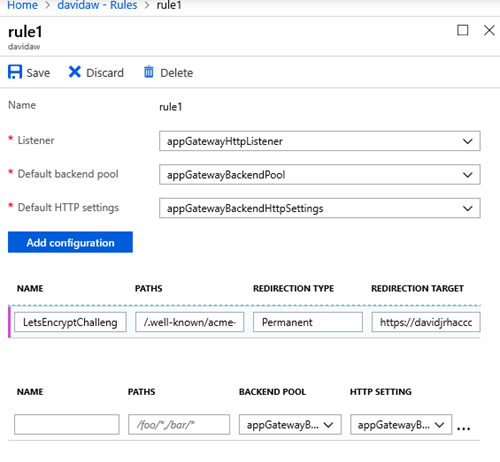
9. Test the rule by creating a file called “test.html” on the storage account and browsing the URL /.well-known/acme-challenge/test.html">/.well-known/acme-challenge/test.html">http://<yourdomain>/.well-known/acme-challenge/test.html

If everything was setup correctly, when browsing the URL, the application gateway should redirect your browser to the storage account as shown below. Don’t continue until you have successfully setup the redirection rule.

Installing the Let’s Encrypt certificate by the first time on the Gateway
To install the Let’s Encrypt certificate on the gateway the first time, you have to issue it first. There are several ways to issue the certificate, but the easiest one is to use Certbot, a tool available on GitHub and built on Python that allows you to obtain certs from Let’s Encrypt. There are other clients, so you can probably share better ideas on the comments area of this post.
I normally use a Windows 10 PC as development environment, and the process to install the tool is described on this link, that basically shows how to install Python and then run “pip install certbot”. But since I had the Linux subsystem enabled on my Windows laptop running Ubuntu, so I followed this other approach:
- Opened a bash console on the Linux subsystem
- Installed Python with “sudo apt-get install certbot”
- Executed the following command to only issue the certificate locally in manual mode, by registering an account with my e-mail address on Let’s Encrypt service and issuing a certificate for domain “api.davidjrh.com” agreeing to the Terms of Service:
sudo certbot certonly --email davidj@intelequia.com -d api.davidjrh.com --agree-tos --manual
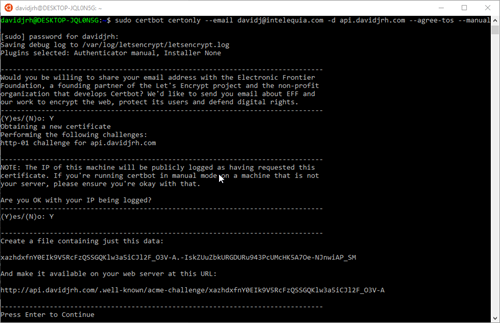
- Followed the screen instructions and created the file on the storage account with the required contents
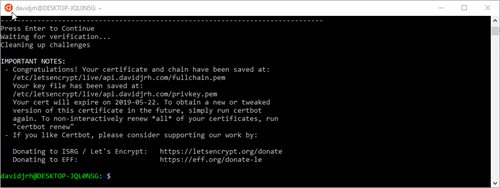
- Successfully issued the certificate
davidjrh@DESKTOP-JQL0N5G:~$ sudo ls /etc/letsencrypt/live/api.davidjrh.com
README cert.pem chain.pem fullchain.pem privkey.pem
The certificate, chain and key are issued in .pem format, so to upload the certificate in .pfx, I used OpenSSL to convert from PEM to PFX:

EDIT 25-Jan-2022: thanks to Leonardo Arariba that detected that now is required to include the chain.pem when doing this conversion, so the right syntax of the openssl command would be:
openssl pkcs12 -inkey privkey.pem -in cert.pem -certfile chain.pem -export -out cert.pfx
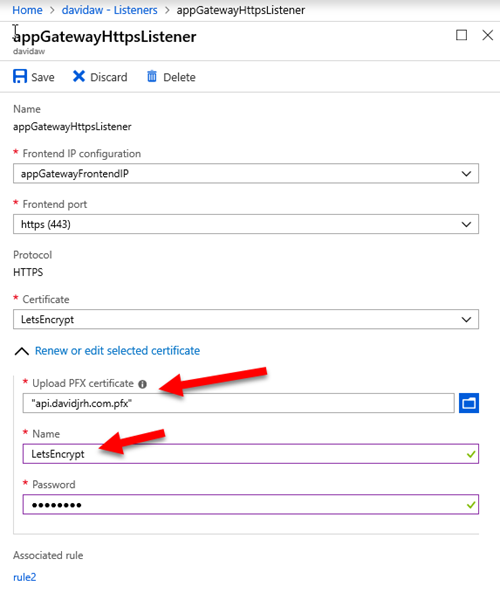
Finally, I modified my current HTTPS listener to use the LetsEncrypt certificate. IMPORTANT: remember the name you are going to give to this certificate, since you will need to specify it as a parameter on the renewal process later
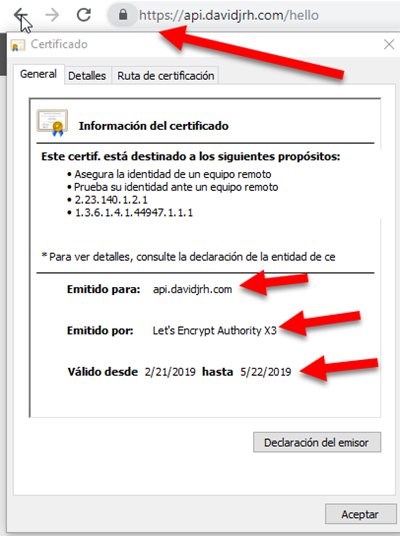
After applying the changes, you can check that the LetsEncrypt SSL certificate is working properly just by browsing a resource via HTTPS
Implementing the renewal process
Now that the LetsEncrypt certificate is installed and working properly, the next step is to automate the renewals. Let’s do it with an Azure Automation runbook.
Create an Automation Account
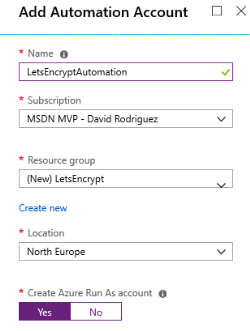
1. On the Azure Portal, create an Azure Automation account (or use an existing one) to host the runbook. Note that you can create this automation account and run up to 500 minutes per month for free.
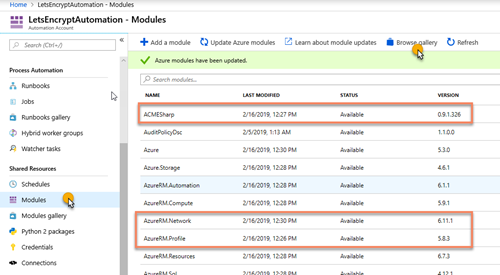
2. Inside the Automation resource, open the Modules and browse the gallery to import the following modules: 'AzureRM.profile', 'AzureRM.Network' and 'ACMESharp'. Ensure you import the latest version of all of them and update the current ones already imported (for example, the AzureRM.profile is enabled by default, but we need the latest version available on the gallery).
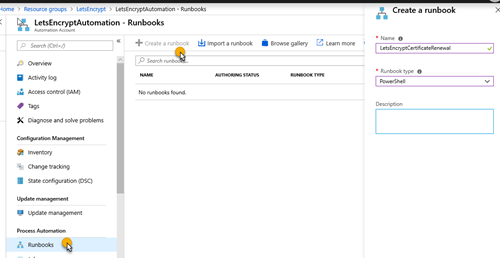
3. On the Azure Automation account, create a PowerShell runbook called LetsEncryptCertificateRenewal
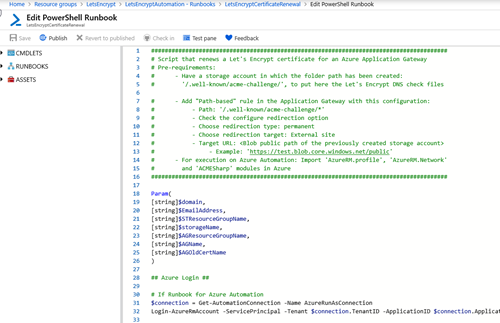
4. Edit the powershell runbook and paste the contents of the script available at GitHub on https://github.com/intelequia/letsencrypt-aw/blob/master/letsencryptaw_v2.ps1, and click on the “Publish” button to make it available for scheduling
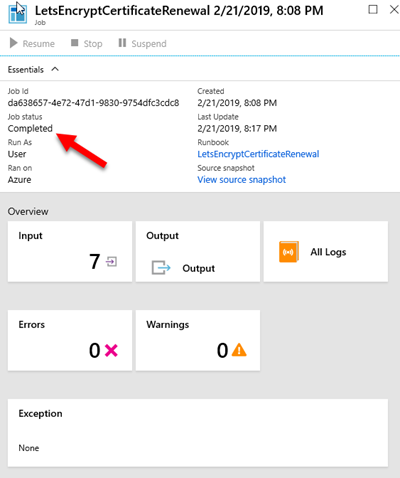
You can test the runbook on the Test pane, and passing the required parameters (domain name, email address used on LetsEncrypt, resource group names, storage account name, application gateway name and the name of the certificate you used when setting up the https listener). It takes around 15min to complete. When browsing the site again with https, you will notice that the certificate was updated correctly.
IMPORTANT: LetsEncrypt has its own weekly limits when issuing certificates for a specific domain in production (50 per week), so be aware when testing the PowerShell script.
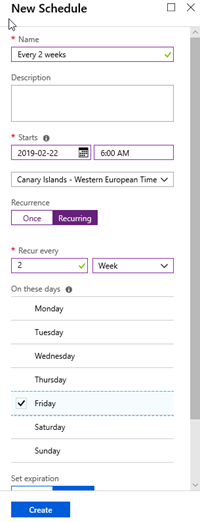
5. Create an Azure Automation Schedule to renew the SSL certificate. In my case, I created a schedule for renewing it every 2 weeks
6. Setup the parameters to schedule the runbook with the schedule you created before.
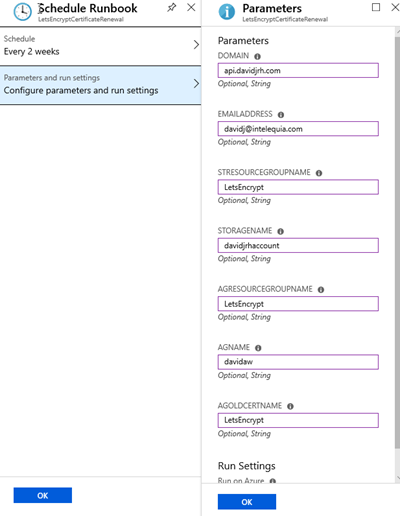
And that’s all. Now you have setup the autorenewals of your Application Gateway SSL certificate with Azure Automation.
Hope this helps!